"Let's have a merry journey, and shout about how light is good and dark is not. What we should do is not future ourselves so much. We should now ourselves. "NOW thyself" is more important than "Know thyself." Reason is what tells us to ignore the present and live in the future. So all we do is make plans. We think that somewhere there are going to be green pastures. It's crazy. Heaven is nothing but a grand, monumental instance of future. Listen, now is good. Now is wonderful." ~ Mel Brooks

Showing posts with label Do. Show all posts

Wednesday, April 10, 2013

The Art of Spring Cleaning

Well! We certainly wasted no time upon reentry of our 10 day holiday to dive right in and create mayhem in our home. These past few days have been warm and quite Springlike so we threw open the windows and inch by inch tore up the stacks and stuffiness of the back of the house (which inevitably means the rest of the house, too).  It all started with these shelves.......

 
These are my craft supply shelves. Over the past few months I haven't been the best at keeping things organized and when I am afforded the time to create I usually just leave everything laid out on our dining room table. Of course, we have to eat so everything gets quickly shoved into where ever it might fit. Ironically, these shelves still haven't been straightened! LOL


This is where we chose to begin. The closet. This 8'x10' room was a closet for 5 people! Me, Lee, Charlotte, Kiki and Seraphina. Utilizing dressers, shelves, and a homemade armoire we somehow (kinda) made it work. There is no door to this room so we  hung a curtain in the doorway to keep visitors eyes from drifting too deeply inside. We very rarely could keep it neat; clothes would easily pile up after being laundered, baskets captured most of the dirty clothes, and a myriad of other non-clothes items would find their way into this space simply because we lack the storage and space in this 1000 sq. ft., one floor, home.  Needless to say, I'm glad we made my craft shelves wait.


This was an in between shot. Partially finished but with plenty more yet to do.


This is what happened to the bathroom.....yes, that's a ton of stuff just piled into the bathtub!


This is Bella's room. The poor Dear had just cleaned her room and we took full advantage of the space while she was at her riding lesson. She just about cried when she saw this picture. I assured her it would be back in order before she went to bed, at it was......more or less!!!


This is the laundry space. Just stacks and stacks and stacks. Oy! I dreaded getting in here because a.) I couldn't just close a door and hide it, this space is right in our hallway. There was no way to avoid it and b.) all of the storage that exists was currently being used for other stuff. Where and how the heck was I going to somehow make room!!!
 
 
In the end, it was all well worth the suffering.
 
This is our finished bedroom. Just to give you an idea of why this is a monumental moment, my husband and I had shared a room with the 3 littles. A 10'x10' room that held a queen size bed, bunk beds, a dresser, a shelving unit, a co sleeper, a micro book shelf, and the cozy corner. Cozy in every sense of the word. For the first time in 7 years, Lee and I have our own room, we do share it still with Seraphina but we still feel like grown ups! Big people! It's just so nice.


This is my side of the room. Heaven!


This is now the "somewhat organized, at least manageable, I can reach what I need" laundry space. That huge black case to the left is my massage table. I'm finding that even though I'm not in school anymore (you can read more about that here) I'm still finding use for it, however obtrusive, it'll have to stay there for now.


The bathroom is back in order except for some shelves that need some minor organizing. For now, it's manageable. In case you were wondering, NO, there is nothing hiding behind the shower curtain!!!


This is Charlotte and Kiki's room. Where the long dresser on the right sits is where our bed used to be. Their room is largely acceptable. We still have clothes piles to contend with but they can be assimilated slowly and at a more leisurely pace.


This is a view to their bunks. Just out of bed but so much more room to jump into from bed. They have a huge bit of space to play in now, thank goodness. Next in here will be a new floor and some minor details like silk curtains and taking those stickers of the bed!! Those stickers used to go on our car window (we were those people!!!) I'll have to figure out another way for them to keep their prized "visit to the bank" stickers.


Now, I just have to clean off the dining room table and.......


.....reinvent this corner. This used to be Rosco's window. His bed was right under the window and gave him the perfect spot to watch us from his resting spot. The window will get spruced up, the radio in the corner will be moved, along with the stash of boxes from various trips to the basement that never got returned. My hope is that my craft shelves can fit here, those drawers can stay and be used for homeschool supplies and the like and a few really beautiful plants can sit atop the dresser  and soak up the sunshine from the south. For me, it feels really important to make that space a beautiful one to look at. I miss my boy everyday and to leave his spot empty just reminds us that his little body is gone. Gotta bring some life back into his space, make it a shared space.
 
 
This mess is our home.....and even though it feels so good when it's not quite as messy, it's doesn't feel any less like home even when it's the messiest.
 
Are you spring cleaning? How's it going for you?
 

Tuesday, February 26, 2013

First Knitting Project.......Ever!


 May our hands complete our task with patience,
May our work be done with care,
May our fingers work as friends together,
Then may we our handwork share.
Our hands have completed the task with patience,
We have done our work with care,
Our fingers have worked as friends together,
And we have our friendship shared.


I've been working on this in the round knit for quite some time. My free time to sit empty lapped and with enough to time to focus (I'm a really new knitter) is limited. I've got this lovely bit of work up at my eye level so I can see it whenever I'm walking through the house, reminding me to be patient, keep my eye on the prize, all things come to those who wait.


I have always wanted to knit, even when I was a little girl. I asked my Mom over and over again to teach me but for whatever reason, she didn't. My high school best friend's Mom crocheted and so she taught me how to do that. My Mom briefly attempted to show me to knit when my son was learning at his Waldorf school......again, I guess it was too frustrating for her to try to teach me and my son. Finally, after being inspired by a beautiful knitted playscape I saw I sat up late one night and taught myself with the help of YouTube videos.  Those little lessons gave me the confidence to knit little hats for our St. Nicholas peg dolls and I adored every minute of it.
 
The only downfall to teaching myself is I really haven't any clue how to read a pattern. I find it terribly frustrating when I've tried and then to discover what I thought it said wasn't what it truly said so my first knitting attempts always got pulled out.  This time, I'm kinda, well......I"m just going for it. I'm knitting and purling and decreasing in a kinda proportioned way.
 
insert shaking head and shrugging shoulders with a "we'll see" smirk on my face


The one thing I can say with absolute satisfaction (aside from the shear joy I get from simply knitting at all), is that this yarn is phenomenal! I haven't the faintest idea what brand it is, I got it from our local yarn shop. It is a wool/mohair blend, that I remember. The colors as so beautiful and the texture is divine, the easiest yarn I've worked with so far. I guess, I'm aiming for a hat? Seems the most logical. A sweet friend suggested a vest, but, I'm feeling quite inferior for that for a first project.
 
I think for a Mother's Day gift (it's months away, I know), I'll request a knitting class.
 
For all you knitters out there......I'd love any suggestions/help/ideas/links/ANYTHING that will help me on my journey to being a knitter. My goal, is to be able to knit sweaters. My Mom used to knit for us, and she knit for the grandkids......I'd love to continue that tradition. Thank you, dear ones xoxo

Friday, February 15, 2013

For Little Hands :: Encouraging Spring

I'm trying to figure out how to work For Little Hands back into my weekly posts, I know consistancy is key and I'm not sure quite yet what the rhythm will look like. My thought this time around is to have it on Fridays as a way to kick of the weekend. I'll add more to it as the idea comes to fruition.

**********************************************

We love the birds that come and visit our bird feeders; their sweet songs and round little bellies. It's a real joy to sit back and watch them and even when we don't, we know they're there and that brings a smile to our faces.

Here is an older post for you to enjoy(with wee hands in mind) about a simple way to interact with your neighborhood birds while  providing much needed nourishment.....at least where it's really wintry this time of year!


Look at my little Charlotte! She sure has grown! Oh my xoxo

Monday, February 11, 2013

Valentine's Day Window Hearts


Candle light, moon light, star light,
The brightest glow is from love light
.

~Terri Guillemets


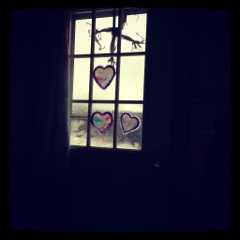
We made a simple Valentine decoration today to adorn our front door windows. I am in love with window transparencies; I love the colors that shine through, how they instantaneously beautify a space, the time and patience it takes to create them. These were awfully simple to create. Using white coffee filters, we water colored them and after they dried, I cut them into heart shapes and glued them to our front door windows (using a glue stick). Using homemade window paint (a simple mixture of tempura paint and dish soap. I didn't measure, I just eye balled it and hoped for the best) I traced the hearts on the window and there you have it!

 
Valentine's Day, I have found, can be such a bright and fun day while we are in the midst of February. At this time of dark and cold days, it's nice to have a day that is simply focused on just being kind and sweet and in love. We'll pull out the Valentine hearts we made last year and use them to decorate our nature table as well as create a few new ones to add to the lot.
 
 
As we get over the February hump and get closer to seeing the stirring of Springtime, I can't help but feel hopeful for the newness that we'll begin to witness. The sheep are beginning to show signs that lambing season will soon be here, birds are busy and chirping away, days are becoming longer and longer, and I know soon enough we will begin to see buds popping up from beneath the snow. Valentine's Day, for me, is a day to stir the sleepy busyness within me. It's been dark and cold for many months and while Valentine's Day isn't warmest or sunniest day of the year, it helps me to remember that with love......all things are possible. We can brighten each others day by simply acting out of love, being love, seeing love within each other. I'll be the first to admit, that it's been hard to be in that place this winter. It's been a trying time and I know I haven't offered up my best self on more than one (or two, or three) occasions. The light that will shine through each of the hearts on our front entry way will serve as a reminder to try to recommit myself to this virtue::
“Before you speak ask yourself: Is it kind, is it necessary, it is true, does it improve upon the silence?”   
~ Shirdi Sai Baba
 
*sigh* Love is good. It softens the heart and brightens the day. How might Valentine's Day shake the winter blues out of you?


*************************
Ironically, as I was perusing Pinterest after this post was published, I came across this post with the exact same Valentine activity!! This has happened before and I love it!! It's amazing to me! Nonetheless, I feel it's important to include it here :)

http://innerchildfun.com/2013/01/quick-valentine-window-display.html

Friday, February 1, 2013

In the spirit of St. Brigid


Today is St. Brigid's Day. It kinda snuck up on me as we were a bit preoccupied over the week so what I had planned in my mind will have to wait until later this week or next year. In the meantime, here is a recipe for a Celtic Tea Cake that I absolutely love. We will make this today in honor of the patroness of Ireland. It is so moist and tasty and sweet. I always wondered, though, how it was called a Celtic cake when it calls for coconut? Oh, well......it still tastes good!!

Ingredients::
Cake:
1/4 cup boiling water
1 cup very hot milk
1 cup quick cooking oats
1/2 cup unsalted butter, softened
1 1/4 cups firmly packed brown sugar
2 large eggs
1 tsp vanilla
1 1/2 cups flour
1 tsps baking powder
1/4 tsp baking soda
1/2 tsp ground cinnamon
1/8 tsp salt

Oatmeal-Crisp Broiled Topping:
4 tbsps unsalted butter, melted
1/2 cup firmly packed brown sugar
1/4 cup milk, cream, or half/half
1/2 cup shredded coconut
1/4 cup quick cooking oats
1/2 cup chopped walnuts

~ Preheat oven to 350. Generously grease a 9-inch round cake pan.

~ In a medium bowl, stir boiling water, hot milk, and oats together and let stand 20 minutes.

~ In another bowl, cream butter with brown sugar until smooth. Mix in eggs and vanilla and blend well. Fold in oat mixture and then flour, baking powder, baking soda, cinnamon, nutmeg, and salt. Blend to make a smooth batter and spoon batter into prepared pan.

~ Bake 30 to 35 minutes or until cake springs back when gently pressed with fingertips. 

~ While cake bakes, in a medium bowl blend together all topping ingredients.

~ After you remove the cake set the oven on broil. Spread topping on cake and place cake under broiler on second shelf for 3 to 5 minutes until topping begins to bubble, watching carefully so it does no burn. Cool well.
 
Looking to tomorrow we've begun making some lanterns to light tomorrow evening in celebration of Candlemas. This is a do ahead project :)
 
Fill some regular balloons with water (not water balloons, too fragile). Freeze them in any manner you can (outside if it's cold enough or in a freezer.) Before they've frozen completely, break open the balloon and pour out the water. There will be a place to set on of those battery operated tea light candles. You could even dye the water different colors and have colored ice lanterns. If your balloons freeze all the way, you will need a paddle attachment drill bit for a power drill and then you could open up a space big enough to fit the tea light candle by drilling into your solid round ice block!


This is one of our lights ready to go! They are very pretty, especially at night when their light dances of  the snow. I will post again tomorrow with more pictures and a little look into how we celebrated St. Brigid's Day and Candlemas!
 
Wishing you all a blessed return of the Light xo

Wednesday, January 23, 2013

New Year, New Rhythm


We humans have been shaped over the millennia bt the rhythmic rotation of the earth, by the diurnal dance of day and night. We have been formed by the rosy shadings of light at dawn, and by nightime's reply as scarlet and violet descend into velvet black. We have grown and evolved in Earth's slow journey around the sun. Day by day our world shifts imperceptibly, moving inexorably from spring's first blossom toward a world glittering in ice diamonds. Both the rapture and the travails of this cycle have formed the human psyche. Although our modern life is far removed from this earth-based consciousness, still our fundamental shaping has been in a rhythmic pattern. Our children, who live closer to basics than we do, are profoundly affected by the life rhythms we determine for them.
~ excerpt from Heaven on Earth by
Sharifa Oppenheimer
 
 
New beginnings have begun in our home. I've been seeking the right rhythm foundation for our home life and lately it's been a bit of a challenge. Seraphina came to us in June of last year and with her came a bit of a whirlwind. I could barely focus let alone try to keep a healthy rhythm alive in our home. Some days I was successful. We'd follow the rhythm that I'd begun prior to baby's arrival (you can read about that here) but between feedings, naps, piles of laundry, sickness (too much sickness), night school......well, I could go on! Needless to say, I've been spinning my wheels for a while and it hasn't felt very good. I can see where my littles are lost and feel like fish out of water. Anyway, the good news is we've begun to move out of the newborn haze (and hopefully the "everyone is sick again" phase) and are working new rhythms into our daily life.
 
Today we started Ring Time. We've done a bit of this in the past but I was at a loss for verses and the like. I've since acquired many lovely books (Wynstones, Waldorf Book of Poetry, for example) to help create our story of poems, finger plays and movement. We had great fun today and I was largely inspired for our winter Ring Circle by Lisa from  Celebrate the Rhythm of Life . I adapted it to fit our needs and boy! We sure had fun! There was laughter, smiles galore, and just pure and simple joy. I loved every minute of it and the littles have requested that we do it again and again! This inspired me to really sit and plan ahead our Ring Time for the year. My intention is to do the same circle for an entire month, that way it can be seasonal and kept appropriate for the holidays and such.

 
We've also begun our home school with Charlotte. She's just turned 5 and she has been asking and asking for more in the way of lessons. We've been having a more "unschool" atmosphere since September, focusing our day around our creative activity for that day (seasonal craft/activity, painting, drawing, baking, and handwork), reading and playing. I was able to purchase an Oak Meadow Kindergarten Syllabus so with that in my arsenal along with a few great nature study guides and the rest of our daily routine we should be in good shape! Kiki participates too. She follows along the day and when Charlotte sits down for her studies I set her up with us at the table to play but eventually she'll wander off and go bask in the glory of having the toys all to herself.


We have tasks that we "should" be completing everyday.......it's been my lack of initiative and motivation to keep on task BUT! It's a new beginning, right......I'll try harder. Our home runs so much more smoothly when I've got my head in the game and lately, I've been sitting under the bleachers ;) I spent this entire past weekend gutting each and every room, cleaning and reorganizing. The laundry that piled up as a result of a months worth of sickness has been washed, folded and put away. All the little things that have been eating away at my confidence as a homemaker have been defeated! (insert heavy sigh of relief here!!). It's wonderful and it makes it so much easier to keep on top of the load when it's actually manageable without needing the National Guard for assistance! This list above is a new addition to our other daily tasks. These are things I would usually just do on my own while having a little stand by and watch me, and usually, they are asking to help. To be honest, most
 times I would say "No, thank you". It wasn't because they were incapable, in fact, all of my children are wonderfully capable and help out in wonderful ways. I'd say "No" because I was too buried among the work aspect, the lack of joy in my work, the burden, that I would just lump it alone. There really is no reason to do that so it's shifting. The littles and I sat this morning and had a grand time folding laundry and Charlotte can not wait to sweep!!! Works for me!!

It excites me greatly to see how willingly life can shift when you can get your head out of your heart and just allow things to unfold as they may. I am much more at peace and I know for sure that my children are too!
 

Tuesday, January 22, 2013

Coloring Winter (an older post for today)


Feeling like a wee bit of color is needed in these dreary, wintry days. Here is an older post (tutorial) on bringing in the forthcoming season of St. Valentine. A bit early, I know but who cares!! It's all in good fun :)


Click the link below for the full post and tutorial!!

Valentine Window Transparency

Monday, January 21, 2013

Celebrate Today

 
This day is very meaningful to my family. Each year we try to be of service somehow,to our community either by reaching out or by simply being present. This year we did both! We spent the morning preparing an alter asking passersby to look within themselves and commit to acting out a random kindness to a stranger or loved one. Then, we spent the afternoon bearing cards and laughter to our neighbors and friends at Camphill Ghent.


This is what our letter said::
In honor of Martin Luther King, Jr. and his life’s work AND in
memory of all the lives lost if only to remind us that…
 “If we have no peace it is because we have forgotten that we belong to each other”
spend today, January 21, 2013,
Committing Random Acts of Kindness.
~ Choose a slip of paper from the bowl and if possible, commit that act of love today! Consider for a moment, that if the paper you choose seems odd or uncomfortable to you, might you go ahead and explore this act of kindness that is out of your comfort zone anyway? It might just be the push you need to commit to being a constant presence of peace within your family and community! I challenge you tomove beyond the worry of “what people might think” and fully understand that…
 “Darkness cannot drive out darkness; only light can do that. Hate cannot drive out hate; only love can do that.”
~ Make sure to leave a little note for the receiver of your Act of Kindness (if it is an anonymous act) encouraging them to begin their own journey of spreading peace and kindness in their own lives by Committing Random Acts of Kindness.


 Our finished poster.


The other part of our day consisted of spending some time over at Camphill Ghent. We just love spending time there with the many wonderful souls who grace the buildings there. It is so peaceful, calming, joyful, relaxing......it's such an honor to be there. The littles (and Bella) made some cards to sneak into the personal mailboxes of some of the residents there saying things like "You are amazing." "I am really glad to know you." "You are beautiful."


Life is so full of busyness. It feels so amazing to be together as a family honoring the lives of others. We had many smiles, hugs, and joy. What better way to spend an afternoon?!
 
I hope you, dear friends, found and/or felt the spirit of love that was intended for this day. xo

Wednesday, March 28, 2012

Dye Week:: Pysanky and Silks


This week has been declared "Dye Week" as Easter is upon us and I just can't wait any longer to get our hands on our Pysanky egg and silk dyes! It's been a long time coming. Between researching the best (and most economical ) way to dye our silks as well as mustering up the courage (and patience) to attempt true Pasanky egg decorating with all the children (minus KiKi our 2 year old; she will experience egg dying another way!), our hands are stained but our home is so colorful. Our branches on our Seasonal Table have now become our Easter Tree and our living room/play room/ wall is now adorned with 12 colorfully dyed play silks (we're just waiting for Mama West Wind's Gnome Clothespins to officially tie our display together)! She does give a tutorial on how to make these, so I could have easily made them myself, but I just love supporting other artist's and crafting Mama's to add color and beauty to our home.


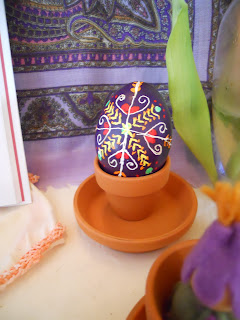
Pysanky egg dying is amazing. It takes a LOT of patience and more patience and time. It certainly isn't for someone looking for instant gratification. There are heart breaks with each egg that is cracked mid decorating and it's really a tense moment when you blow them out (we wait until after we're finished decorating to blow out our eggs to give them a bit more heft during decorating). All in all, the children loved to heat their own kistka and watch the beeswax melt into the cup and then apply the wax any way they choose. Each dye bath gives a new color and surprise to the finished egg. I loved hearing Charlotte "ooo" and "ahhh" each time her egg came out of the dye! And then to see them hanging from our tree! So pretty! We're feeling so blessed with the beauty of this time of year!

Here is Casen trying his hand at Pysanky

I love this shot of my son, Casen. I very rarely get him in photos and he turned just
as I took the picture. I love his eyes xoxo

Today it's awfully chilly and rainy outside, so I imagined our home warm with steam from dying our silks. As I stirred our pot with a wooden spoon, mixing our silks with the dye, I felt like the women of yore who used to wash their laundry using pots and wooden spoons. It brought on a nostalgia I'm not familiar with but long to understand. Anyway, I know there are many tutorials on how to dye play silks out there online, I read a bunch of them. Each one gave me more inspiration and courage to go ahead and take the plunge. Dying silks isn't exactly a difficult task, it just takes some time and a "no fear" attitude when mixing your colors. It was amazing to me how beautiful our silks came out and how vibrant the colors. I even adore the little specks of white or a paler version of the main color that shows on some of the silks. It gives them that hand-dyed feel. They aren't perfect, but their ours.

We used Kool-Aid (of all things) to dye our silks. At .20 cents a pack I couldn't resist. I did, sadly, have to go to the Wal-mart to find the color selection I was looking for. Our local grocery only carried certain ones,and only 3-4 single packets at that! It felt strange to be purchasing all that Kool-Aid, even though I knew we weren't going to drink it, I was still walking out of the store with 30 packets! I found it kinda funny!!! The colors I purchased were cherry, strawberry, and black cherry (red), mixed berry (blue), lemon lime (green), lemonade (yellow), pink lemonade (pink), grape (purple), orange (orange).

I purchased our silks at Dharma Trading. This link will take you to the Habotai scarf page (we purchased 12 - 35x35 silks). This link will take you to the Habotai veil page. We purchased 3 - 55x108 veils for tent making. I'll be getting a few more to try water coloring for our dining table and to make curtains out of. I also purchased silk handkerchiefs to dye for our littlest bundle when she arrives. Peek a boo silks are so much fun and even though she won't be able to actually play with them at first, she'll have something soft and smooth to hang on to and chew on!
You will need::
Silks
* 35x35 is the standard play silk size or larger for tent making or smaller for peek a boo silks*
Kool-Aid packets
* you will need at least 2 per silk consider what colors you want to make
and make a list so you'll know what you need*
A pot and wooden spoon
White distilled vinegar
4 cups of hot water per dye bath
Something to dry your silks on
* outside would be ideal, on a laundry line if you have one, we have a wooden
rack for indoors but the backs of chairs work fine*
A towel to keep under your silks as they dry, if you're drying in your home

I made a few mistakes as I went along as I didn't follow the advice of any one person. It was definitely a trial and error process. I did my best to include answers to the questions I had while dying that weren't included in the tutorials I had read! If you have other questions, please post them in the comments or on our Facebook page and I will answer them as best I can!

First you will need to soak your silks in hot water with about 1/2 cup of vinegar. This will remove any residue that exists from the making of the silk. I soaked my in my washing machine and then used the spin cycle to wring them out!

To begin, fill a pot with 4 cups of water, 2 tablespoons of vinegar,
and 2  packets of your chosen color of Kool-Aid. Warm up the water and Kool-Aid on your
stove top to just below boiling. Put the silk in and stir, lift and move around the water to
evenly (as best as you can) distribute the color.
* I've included a list of what colors I used and how many packets below.
This recipe is for 1-35x35 scarf and 1 hankie mixed together.
This was where I made my first mistake! At first I only added 2 cups of water for one
35x35 scarf. As you can see it wasn't enough!
This is how it looked when I added the other 2 cups of water! Just right!
Once you've mixed your scarfs around the colored water you'll notice that the water will
begin to turn clear. This is when you can take your scarf out and run it under cold
water until the water runs clear from the scarf.

 And believe it or not.......that's it! So simple! Once your rinse your scarf, wring it out and hang it up to dry. I tossed ours in the dryer on the delicate cycle once they were just about dry. I did a few multi colored scarfs, too. The instructions change a bit in that I only add 1 packet of Kool-Aid to 2 cups of water with 1 tablespoon of vinegar. I boil the water in a kettle and then used 3 mason jars to mix the silks in! I was able to use the mixture for two scarves at once and I did sneak in one hankie in each jar, too!


For a multi colored veil (55x108) I used the same jar method, one packet of dye, 2 1/2 cups of water, and 4 tablespoons of vinegar.

This was "supposed" to be more rainbow like, however I only had one packet of
lemonade (yellow) left so it came out pretty faint and I realize now that I
should have used a full quart of water. Remember to be mindful of how and
where your colors mingle, for example in between blue and red
will be purple if you mix them together a bit.
 I plan to re-dye the yellow part to give it a little more punch.

My Kool-Aid color chart::
(based on our color experience)
The amount of packets is for one scarf and hankie. Veils will be 3 of each
Red:: 2 packets of either cherry, fruit punch, black cherry or strawberry
Orange:: 2 packets of orange
Yellow:: 3 packets of lemonade
Green:: 2 packets of lemon lime
Blue:: 2 packets of mixed berry and 1 packet of grape (same for veil)
Pink:: 2 packets of pink lemonade
If you try your hand at this please let me know how it goes. Post your pics on our Facebook page for our "Share Inspiration" album! These would make a lovely gift for your wee ones for their Easter basket or just because! Their color and the feel of these silks are so wonderful. Enjoy! I know we are!

Related Posts Plugin for WordPress, Blogger...